Welcome to the world of flower nail art – an exciting and creative way to express your style with a touch of floral beauty! This spring, why not try out some amazing nail designs inspired by delicate blooms? From classic painted petals to delicate decals, many wonderful ideas can help you rock those freshly-manicured digits. So whether you go for something subtly chic or full-on blinged-out glamour, this guide will show you how to create stunning flowery nails like a pro. So keep reading for our step-by-step tutorials on making beautiful flower manicures in every rainbow color!
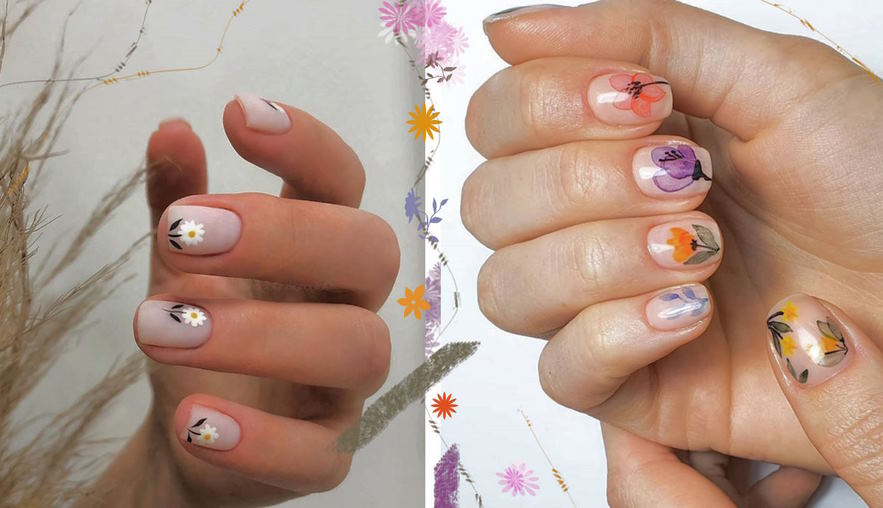
 Get inspired by these floral nail art designs
Whether you’re a nail art beginner or an expert, adding flowery flair to your mani is always fun. From subtle pastel petals to bold bouquets of blooms, discover the prettiest floral nail art ideas that are sure to make your nails stand out from the rest. Choose intricate designs featuring daisies, roses, and other beautiful blooms for a special occasion or try a simple design for everyday wear. Floral nail art is perfect for any season! So what are you waiting for? Get inspired by these stunning floral nail art ideas and create your own unique look.
From classic rosebuds to abstract flower shapes, there are countless ways to add beauty and elegance to your nails with trendy floral nail art designs. Get creative with a combination of colors and shapes like stripes, dots, and polka dots to create intricate patterns or keep things simple with just one big bloom on each nail. If you’re feeling extra daring, try adding some glitter for a bit of sparkle or go for an ombre-style design for a more subtle look. Finally, don’t forget to use a topcoat to ensure your flowers stay in place all day long!
No matter what type of floral design you choose, it’s sure to be eye-catching and beautiful. So take some time out of your day, get inspired by these amazing floral nail art ideas, and create something truly unique that will leave everyone in awe.
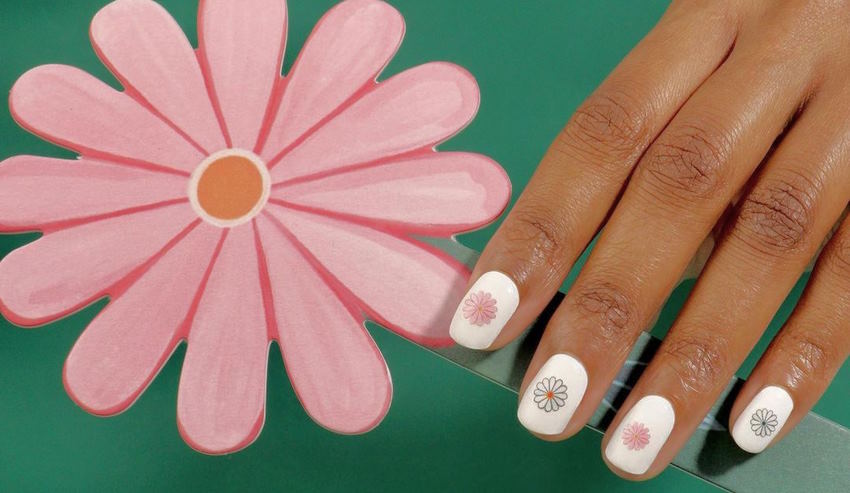
 Step-by-step guide to create beautiful flower nail art designs
- Create the outline for your design. If you want to do a simple flower nail art, use a thin brush and white or ivory paint to draw the outline of a single flower in the center of each nail. For more complex designs, create clusters of flowers on one or two nails, or make a trail of small flowers along the sides of all ten fingers.
- Fill in your design with color. Start by using thin brushes and different paint colors to add details to each flower on the nail. You can also add leaves, shadows and other accents around them if desired. Finish off with dots, lines, swirls and any other details that will bring your design together as a complete work of art!
- Seal your design with a top coat. A good quality top coat will help ensure that your nail art lasts for several days without chipping or smudging, so apply one after all the painting is finished! Allow the nails to dry completely before shaking hands or touching them with anything else.
- Show off your beautiful flower nail art! Once you’re done and your nails are completely dry, show off your amazing work! Take pictures of your nail art designs and share them on social media, or show them to friends and family in person! With practice and patience, you can create beautiful floral designs that will last for several days.